Have you ever taken a photo that turned out to be disappointingly blurry? Whether it’s due to shaky hands, poor lighting, or a camera’s limitations, blurry images can be a real letdown. But fear not, because in this article, we’re going to unveil the secrets of blurry image repair, providing you with a step-by-step approach to rescue your precious pictures.
Understanding the Causes of Blurry Images
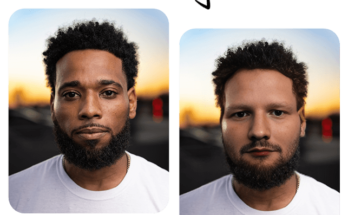
Before we dive into the steps to repair blurry images, it’s essential to understand the various factors that can lead to image blurriness. Instant photo enhancement Recognizing the root cause of the problem will help you choose the right approach to fix it. The common causes of blurry images include:
1. Camera Shake
One of the most common causes of image blur is camera shake. When you capture a photo without stable support or while moving, it can result in shaky and blurry images.
2. Low Light Conditions
Insufficient light can cause your camera to use slower shutter speeds, leading to longer exposure times, which can introduce blur due to hand movement or subject motion.
3. Out-of-Focus
Sometimes, an image appears blurry simply because the camera failed to focus on the subject correctly. This can happen due to a misaligned auto-focus system or human error.
4. Motion Blur
Capturing fast-moving subjects with a slow shutter speed can result in motion blur, where the subject appears smeared in the image.
5. Lens Distortions
Certain types of lenses may introduce distortions or blurriness at the edges of the frame, commonly known as lens aberrations.
Step-by-Step Approach to Repair Blurry Images
Now that we’ve identified the potential causes of blurry images, let’s walk through a step-by-step approach to repair them.
Step 1: Select the Right Software
Start by selecting suitable image editing software. You can choose from a variety of options, ranging from free software like GIMP to paid alternatives like Adobe Photoshop or specialized tools like Focus Magic or SmartDeblur.
Step 2: Import Your Image
Once you’ve chosen your editing software, import the blurry image you want to repair into the program.
Step 3: Duplicate the Image
Before making any edits, it’s a good practice to duplicate the image. This ensures that you always have the original to fall back on if things don’t go as planned during the repair process.
Step 4: Sharpen the Image
Begin the repair process by applying a sharpening filter. Most image editing software provides various sharpening options, such as Unsharp Mask or Smart Sharpen. Experiment with these settings to find the right balance between sharpness and noise.
Step 5: Noise Reduction
If your image exhibits noticeable noise after sharpening, apply a noise reduction filter. Reducing noise can help improve the overall quality of the repaired image.
Step 6: Correcting Camera Shake
If the blurriness is due to camera shake, some software tools allow you to deconvolve the image. This process tries to reverse the effects of camera shake and bring out sharper details.
Step 7: Enhancing Focus
To address focus-related blurriness, you can use tools like the “sharpen” or “focus” adjustments to increase the clarity of your subject. Be careful not to overdo it, as excessive sharpening can introduce artifacts.
Step 8: Correcting Motion Blur
When dealing with motion blur, some software offers motion blur reduction filters that attempt to reverse the blurring effect caused by moving subjects or camera movement.
Step 9: Correcting Lens Distortions
To address lens distortions, you can use lens correction filters or adjustments available in your editing software. These can help to reduce distortions and improve image quality.
Step 10: Review and Fine-Tune
After applying these various adjustments, review your image to assess the improvements. Fine-tune the settings as needed to achieve the best result while avoiding excessive alterations that could make the image look unnatural.
Step 11: Save Your Repaired Image
Once you are satisfied with the repaired image, save it in a format that preserves image quality, such as JPEG or TIFF. This will ensure that your hard work doesn’t go to waste.
Conclusion
Repairing blurry images can be a challenging yet rewarding task. By following this step-by-step approach and understanding the causes of image blurriness, you can significantly improve the quality of your photos. Remember, practice makes perfect, and as you gain experience, you’ll become more adept at rescuing precious memories from the clutches of blur. So, the next time you encounter a blurry image, don’t despair—unveil the secrets of image repair and bring your photos back to life.